What are the installation tips for Tohatsu replacement parts?
As a trusted supplier of Replace Tohatsu Parts, I’ve had the privilege of assisting numerous customers in the installation of these essential components. Tohatsu engines are renowned for their reliability and performance, but like any mechanical system, they may require replacement parts over time. In this blog, I’ll share some valuable installation tips to ensure a smooth and successful process. Replace Tohatsu Parts
Pre – installation Preparation
Before you even start the installation process, it’s crucial to gather all the necessary tools and materials. This includes wrenches, screwdrivers, pliers, and any specialized tools that may be required for your specific Tohatsu part. Refer to the Tohatsu engine manual for a comprehensive list of tools.
Inspect the replacement part thoroughly upon receipt. Check for any signs of damage during shipping, such as cracks, dents, or missing components. If you notice any issues, contact our customer service immediately. We stand behind the quality of our parts and will assist you in resolving any problems.
It’s also important to clean the area where the new part will be installed. Remove any dirt, debris, or old gasket material from the mating surfaces. This ensures a proper seal and prevents leaks. Use a suitable cleaning solvent and a clean cloth to achieve a clean surface.
Safety First
Safety should always be your top priority when working on your Tohatsu engine. Disconnect the battery to prevent any electrical shocks or accidental starting. Wear appropriate safety gear, such as gloves and safety glasses, to protect yourself from sharp edges and flying debris.
If you’re working on an outboard motor, make sure the motor is securely mounted and stable. If necessary, use a stand or other support to prevent the motor from tipping over during the installation process.
Installation Steps
- Refer to the Manual: The Tohatsu engine manual is your best friend during the installation process. It provides detailed instructions and diagrams specific to your engine model. Follow the manual step – by – step to ensure correct installation.
- Remove the Old Part: Carefully remove the old part from the engine. This may involve loosening bolts, nuts, or clamps. Keep track of all the fasteners and small parts, as you’ll need to reuse or replace them.
- Prepare the New Part: Some replacement parts may require pre – installation preparation, such as lubricating O – rings or applying gasket sealant. Follow the manufacturer’s instructions for your specific part.
- Install the New Part: Align the new part correctly with the mounting points on the engine. Make sure all the holes and connections match up. Insert the fasteners and tighten them to the specified torque values. Over – tightening can damage the part or the engine, while under – tightening can lead to leaks or loose connections.
- Check for Clearances: After installing the new part, check for any clearances between moving parts. Make sure there is no interference or rubbing that could cause damage.
- Reconnect Electrical and Fuel Lines: If the replacement part involves electrical connections or fuel lines, make sure they are reconnected correctly. Check for any signs of leaks or loose connections.
- Test the Engine: Once the installation is complete, reconnect the battery and start the engine. Listen for any unusual noises or vibrations. Check for any leaks around the newly installed part. If everything seems normal, run the engine at idle for a few minutes and then gradually increase the speed to ensure proper operation.
Common Installation Mistakes to Avoid
- Not Reading the Manual: Skipping the manual can lead to incorrect installation, which may result in engine damage or poor performance.
- Using the Wrong Tools: Using the wrong size or type of tools can damage the parts or make the installation more difficult.
- Over – Tightening Fasteners: As mentioned earlier, over – tightening can cause damage to the part or the engine. Always follow the specified torque values.
- Not Cleaning the Surfaces: Failing to clean the mating surfaces can lead to leaks and poor performance.
- Ignoring Safety Precautions: Working on an engine without proper safety gear or precautions can be dangerous. Always prioritize safety.
Troubleshooting
If you encounter any problems during the installation process, don’t panic. First, refer to the Tohatsu engine manual for troubleshooting tips. If the problem persists, contact our technical support team. We have a team of experienced technicians who can assist you in diagnosing and resolving the issue.
Conclusion

Installing Tohatsu replacement parts can be a straightforward process if you follow these tips. By preparing properly, prioritizing safety, and following the installation instructions, you can ensure a successful installation and keep your Tohatsu engine running smoothly.
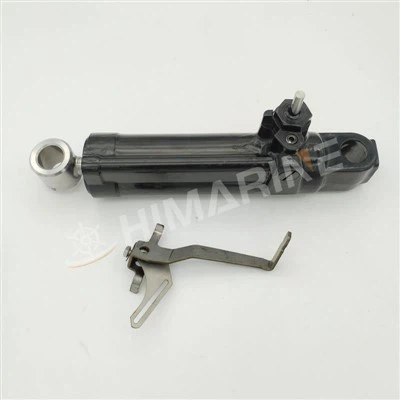
E9.9DMH E15DMH ACCESSORIES If you’re in need of high – quality Replace Tohatsu Parts, we’re here to help. Our extensive inventory includes a wide range of parts to meet your needs. Whether you’re a professional mechanic or a DIY enthusiast, we can provide the parts and support you require. Contact us today to discuss your requirements and start the procurement process.
References
- Tohatsu Outboard Engine Service Manuals
- Industry best practices for marine engine part installation
Jinhua Himarine Machinery Co.,Ltd
As one of the most professional outboard motor 4 stroke manufacturers in China, we’re featured by quality products and low price. Please rest assured to buy or wholesale cheap outboard motor 4 stroke for sale here from our factory. For customized service, contact us now.
Address: No.377 Shencun Road, Shanghua Street, Lanxi City, Zhejiang Province, China
E-mail: john@himarineparts.com
WebSite: https://www.himarinepower.com/